Updating the Code
The first step when writing any DirectX-enabled application is adding the Direct3D header.
#include <d3d10.h>
#include <d3dx10.h>
The following three variables need to be added into the globals section at the top of the code.
// Direct3D global vars
ID3D10Device*                 pD3DDevice = NULL;
IDXGISwapChain*            pSwapChain = NULL;
ID3D10RenderTargetView* pRenderTargetView = NULL;
There are three
pointers being created, one for the D3D10 device, one for the swap
chain, and finally, one for the render target view.
Next, you add a call to the InitDirect3D function, which you’ll be defining a bit further down in the code. This call should be placed right after the InitWindow
call within the WinMain function. Notice that the InitDirect3D takes three parameters, the handle to the application window and the width and height.
// called after creating the window
if ( !InitDirect3D( mainhWnd, width, height) )
{
    return 0;
}
If the function fails for any reason, the application will end.
Changing the Message Loop
The message loop needs to
only change slightly. The loop is already set up to process the normal
application messages, but now it has to change to also perform the game
processing that’s needed.
The only difference in the message loop is the addition of a call to the Render function. This function, which will be defined in a bit, handles drawing everything to the screen.
// Main message loop
MSG msg = {0};
while (WM_QUIT != msg.message)
{
    while (PeekMessage(&msg, NULL, 0, 0, PM_REMOVE) == TRUE)
    {
        TranslateMessage(&msg);
        DispatchMessage(&msg);
    }

    // Call the render function
    Render();
}
The Init Function
The InitDirect3D function creates the Direct3D object and the device.
/*******************************************************************
* InitDirect3D
* Initializes Direct3D
* Inputs - Parent window handle - HWND,
            Window width - int
            Window height - int

* Outputs - true if successful, false if failed - bool
*******************************************************************/
bool InitDirect3D(HWND hWnd, int width, int height)
{
    // Create the clear the DXGI_SWAP_CHAIN_DESC structure
    DXGI_SWAP_CHAIN_DESC swapChainDesc;
    ZeroMemory(&swapChainDesc, sizeof(swapChainDesc));

    // Fill in the needed values
    swapChainDesc.BufferCount = 1;
    swapChainDesc.BufferDesc.Width = width;
    swapChainDesc.BufferDesc.Height = height;
    swapChainDesc.BufferDesc.Format = DXGI_FORMAT_R8G8B8A8_UNORM;
    swapChainDesc.BufferDesc.RefreshRate.Numerator = 60;
    swapChainDesc.BufferDesc.RefreshRate.Denominator = 1;
    swapChainDesc.BufferUsage = DXGI_USAGE_RENDER_TARGET_OUTPUT;
    swapChainDesc.OutputWindow = hWnd;
    swapChainDesc.SampleDesc.Count = 1;
    swapChainDesc.SampleDesc.Quality = 0;
    swapChainDesc.Windowed = TRUE;

    // Create the D3D device and the swap chain
    HRESULT hr = D3D10CreateDeviceAndSwapChain(NULL,
        D3D10_DRIVER_TYPE_REFERENCE,
        NULL,
        0,
        D3D10_SDK_VERSION,
        &swapChainDesc,
        &pSwapChain,
        &pD3DDevice);

    // Error checking. Make sure the device was created
    if (hr != S_OK)
    {
        return false;
    }
    // Get the back buffer from the swapchain
    ID3D10Texture2D *pBackBuffer;
    hr = pSwapChain->GetBuffer(0, __uuidof(ID3D10Texture2D), (LPVOID*)
    &pBackBuffer);
    if (hr != S_OK)
    {
        return false;
    }

    // create the render target view
    hr = pD3DDevice->CreateRenderTargetView(pBackBuffer, NULL,
    &pRenderTargetView);

    // release the back buffer
    pBackBuffer->Release();

    // Make sure the render target view was created successfully
    if (hr != S_OK)
    {
        return false;
    }

    // set the render target
    pD3DDevice->OMSetRenderTargets(1, &pRenderTargetView, NULL);

    // create and set the viewport
    D3D10_VIEWPORT viewPort;
    viewPort.Width = width;
    viewPort.Height = height;
    viewPort.MinDepth = 0.0f;
    viewPort.MaxDepth = 1.0f;
    viewPort.TopLeftX = 0;
    viewPort.TopLeftY = 0;
    pD3DDevice->RSSetViewports(1, &viewPort);

    return true;
}
Next, the back buffer from the swap chain is set up as the render target. Finally, the viewport that is used by the Rasterizer stage is defined.
The Render Function
The Render
function is where the actual drawing takes place. As you recall from
earlier, this function is called from within the main loop and is called
once per frame.
/*******************************************************************
* Render
* All drawing happens in the Render function
* Inputs - void
* Outputs - void
*******************************************************************/
void Render()
{
    if (pD3DDevice != NULL)
    {
        // clear the target buffer
        pD3DDevice->ClearRenderTargetView(pRenderTargetView, D3DXCOLOR
        (0.0f, 0.0f, 0.0f, 0.0f));

        // All drawing will go here.

        // display the next item in the swap chain
        pSwapChain->Present(0, 0);
    }
}
This is a simple example of a Render function. First, you check to make sure that you have a valid ID3D10Device device by checking it against NULL. If this object has been released before calling the Render function, you don’t want further code in here to execute.
First, you need to make use of the ClearRenderTargetView function presented earlier. This clears the render target with the defined color. The color is defined using the D3DXCOLOR macro.
Next, you add in the code
that performs the drawing for your application. Since nothing is being
drawn, the screen will just be cleared to the specified color.
Lastly, flip the buffers in the swap chain with the Present function.
The ShutdownDirect3D Function
Of course, after the
application ends, you need to release the objects that were created.
This is handled with the following code.
/*******************************************************************
* ShutdownDirect3D
* Closes down and releases the resources for Direct3D
* Inputs - void
* Outputs - void
*******************************************************************/
void ShutdownDirect3D()
{
    // release the rendertarget
    if (pRenderTargetView)
    {
        pRenderTargetView->Release();
    }

    // release the swapchain
    if (pSwapChain)
    {
        pSwapChain->Release();
    }

    // release the D3D Device
    if (pD3DDevice)
    {
        pD3DDevice->Release();
    }
}
First,
the objects are checked to make sure they are still valid; if so, then
they are released. The preceding function should be added right before
the return call at the end of the WinMain function.
Adding the DirectX Libraries
At last, you have all the
code you need to create your first DirectX application. Before you can
compile and run this, you have to do one more thing: link in the DirectX
libraries. For this simple example, you only need to link with
D3D10.lib.
Select the Properties option from the Project menu. The Project Properties dialog box appears. This dialog box is shown in Figure 1.
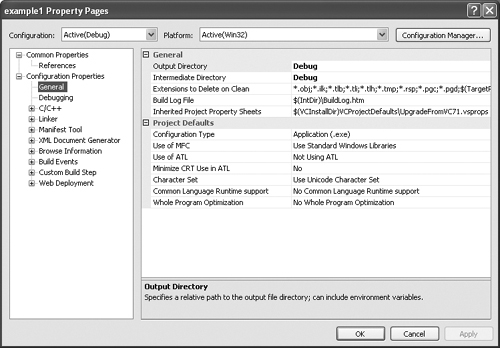
Click the Linker option in the left pane. This expands to show the included options.
Next, select the Input option. The dialog box changes and should reflect what’s shown in Figure 2.
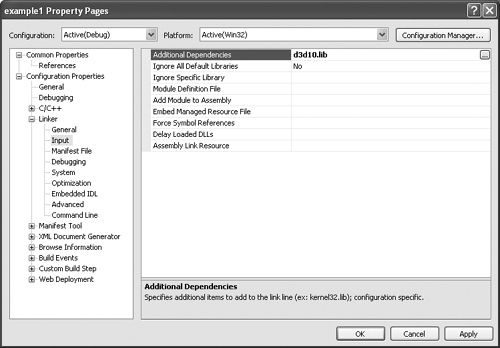
Type D3D10.lib into the Additional Dependencies field and click OK.
Compile
and run the application. Unlike the white window from before, this
window should now display a black background color. Although this
application doesn’t show the depth of what DirectX can do, it does give
you the basics to start with.
Note
Multiple libraries
are needed for different DirectX functionality. You only need to link to
those specific libraries within which you are accessing functions.